
Custom WordPress Menu Tutorial: Enhance Website Navigation
Unlock the Power of WordPress with Our Custom WordPress Menu Tutorial. As the world’s leading content management system, WordPress provides unparalleled customization options. One of the keys to optimizing your website’s usability and visual appeal is by crafting custom menus.
In this comprehensive guide, we will lead you through the process of creating custom menus in WordPress. Consequently, this will ensure a seamless and user-friendly navigation experience. This is regardless of your WordPress expertise.
Step 1: Access the WordPress Dashboard
At first, log in to your WordPress dashboard. This is usually done by adding “/wp-admin” after your website’s URL (e.g., “yourwebsite.com/wp-admin”). Then, enter your credentials to access your site’s admin panel.
Step 2: Navigate to the Menu Settings
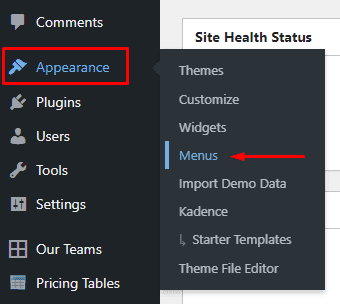
After logging in, you’ll find yourself in the WordPress dashboard. From here, go to the Appearance tab on the left-hand side. Click on Menus.
Step 3: Create a New Custom WordPress Menu
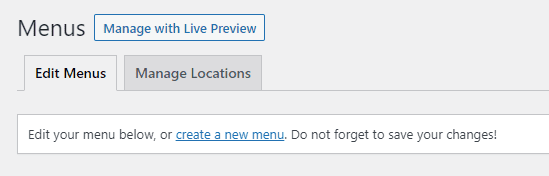
Once you’re in the Menu editor, you’ll see an option to create a new menu. Therefore, give your menu a name, something descriptive, like Main Menu or Header Navigation.
After naming your menu, click the Create Menu button.
Step 4: Add Pages, Posts, or Custom Links
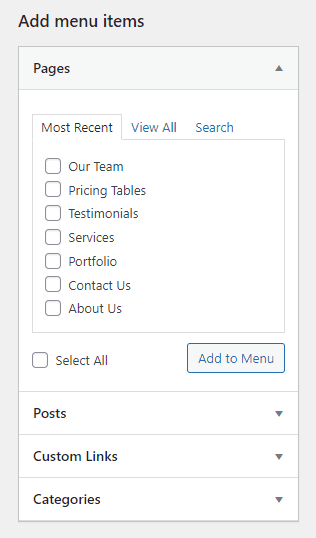
Now, you can start adding items to your menu. On the left side of the menu editor, you’ll see options to add pages, posts, custom links, or categories to your menu. Simply check the items you want to add and click the Add to Menu button.
In addition, you can rearrange menu items by dragging and dropping them into your preferred order. Therefore, this will determine how they appear on your website.
Step 5: Customize Your Custom WordPress Menu
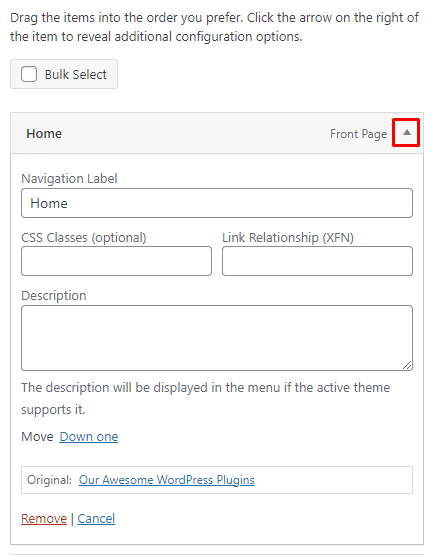
Each menu item can be customized by clicking the small arrow on the right side. As a result, you can change the navigation label (the text that appears on the menu), add a title attribute, and define a CSS class.
Moreover, you can also create sub-menus by dragging menu items slightly to the right, creating a hierarchy of navigation options. So, this is particularly useful for organizing a complex menu structure.
Step 6: Set Menu Locations
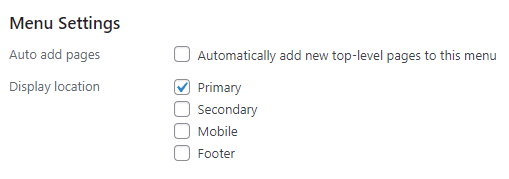
After customizing your menu items, scroll down to the Menu Settings section. Here, you can assign your custom menu to various locations on your website, depending on your theme. Common locations include the primary menu, header menu, and footer menu.
Once you’ve chosen your desired menu location, click the Save Menu button.
Step 7: Preview Your Changes
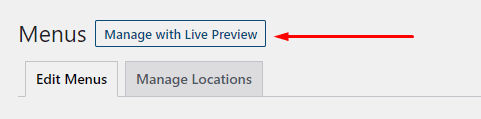
Before saving your menus, to see how your custom WordPress menu will appear on your website, click the Manage with Live Preview button at the top of the menu editor. This allows you to make sure everything looks as you intended.
Step 8: Publish Your Custom WordPress Menu
If you’re satisfied with your menu’s appearance and functionality, click the Save Menu button once more to finalize your changes.
Congratulations! Your custom menu is now live on your website!
Adding Multiple Custom WordPress Menus
While many WordPress themes come with a default menu, you can add additional custom menus to your website. Here’s how:
Step 1: Register Custom Menus
To create additional menus, you need to register them in your WordPress theme’s functions.php file. You can access this file by going to your WordPress dashboard, navigating to Appearance, and clicking on Theme Editor. Then, select the functions.php file from the list on the right.
Next, add the following code at the end of the functions.php file:
/* CUSTOM MENUS */
function add_custom_menu() {
    register_nav_menus(
        array(
            'main-menu' => __('Primary Menu'),
            'rwc-menu' => __('Secondary Menu')
        )
    );
}

// Add the above function to the 'init' hook.
add_action('init', 'add_custom_menu');
This code registers two custom menus, Primary Menu and Secondary Menu. You can customize these names to suit your website’s needs by modifying the text within the single quotes.
Step 2: Create Additional Menus
Once you’ve added the code and saved the functions.php file, go to your WordPress dashboard, click on Appearance, and select Menus. You’ll now see a Create Menu tab on this page. Click it and enter a new menu name, such as Footer Menu.
Step 3: Assign Menu to Display Locations
After creating your new menu, scroll down to the Display Locations module on the Menus page. Here, you’ll find a list of available menu locations in your theme. Activate the custom menu you just created by selecting it from the dropdown menu corresponding to the location where you want to display it, and click the Save Menu button.
Step 4: Display the Secondary Menu
To display your new secondary menu in your theme, you need to add a code snippet to your theme’s template files. Depending on where you want to place the menu (e.g., in the sidebar or footer), you can add the following code to the relevant template file (e.g., sidebar.php or footer.php):
<?php wp_nav_menu( array( 'theme_location' => 'rwc-menu' ) ); ?>This code calls the Secondary Menu you registered earlier and displays it in the location specified in the template file. Ensure that you place this code inside the appropriate HTML structure to ensure proper rendering.
Custom menus are an essential aspect of WordPress website development. They allow you to create a seamless and user-friendly navigation experience. Therefore, by following this step-by-step guide you can successfully create custom menus on your WordPress websites.
Remember, your menu structure should be intuitive and user-friendly. Take time to plan and organize your menu items to ensure your website visitors can easily find the content they’re looking for.
Creating custom menus in WordPress is a straightforward process that greatly enhances the user experience. Don’t hesitate to experiment and create menus that suit your website’s unique needs. Enjoy the process, and watch your website become even more user-friendly and engaging!


There are no comments yet for this post