


How to Install WordPress Using Fantastico on cPanel
WordPress is a free, open source web or blog publishing system powered by PHP and MySQL. It is popular and powerful blogging software used by over 26.4% of the 1,000,000 biggest websites. I must say that it is an outstanding choice to choose WordPress as your blogging platform. Now, the question is how will you install WordPress? Don’t worry, I will tell you how to install WordPress using cPanel. You will find many procedures to install WordPress by searching Google, but here I will show the easiest way to install WordPress, for which you don’t need to know PHP or MySQL. Just follow the steps, I have mentioned below:
Own a Domain Name and Host it
The advantage of using WordPress is that you can develop your blog with your own domain name. To do that, you have to buy a domain name and host that domain in a web-hosting server. As in this tutorial, I will use cPanel to install WordPress, hope that you have chosen a web host that offer cPanel. At Realwebcare beside web development we also provide web hosting and domain registration services for companies or individuals interested in their web design and website development needs.
Login to cPanel to Install WordPress
You will receive an email with your cPanel login information after signing up. To get the access in your panel you have to type your domain name and then /cpanel (e.g. http://yourdomain.com/cpanel). Enter your username and password, which are available in your welcome letter, to get the access in your cPanel.
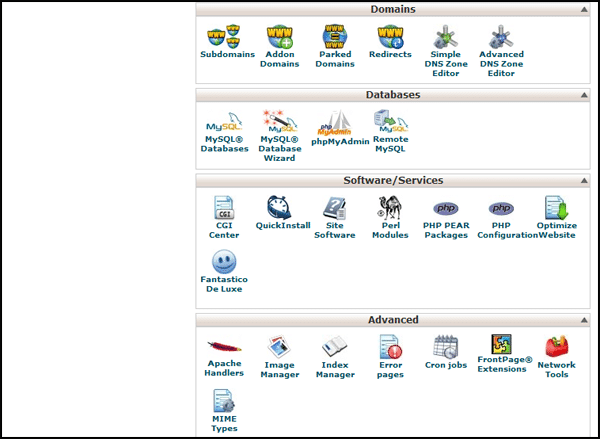
After successfully login to cPanel, you will be on the panel home page (See the image below). Maybe your home page look different from the image, but the function will remain same.
Click on Fantastico Deluxe
Scroll down your cPanel home page to get Fantastico Deluxe under Software/Services section. The advantage of using Fantastico Deluxe is you don’t need to set your MySQL database or any other features manually. Fantastico Deluxe will do everything automatically to install WordPress for your blog. So, why are you still waiting for? Click on the Fantastico Deluxe icon.
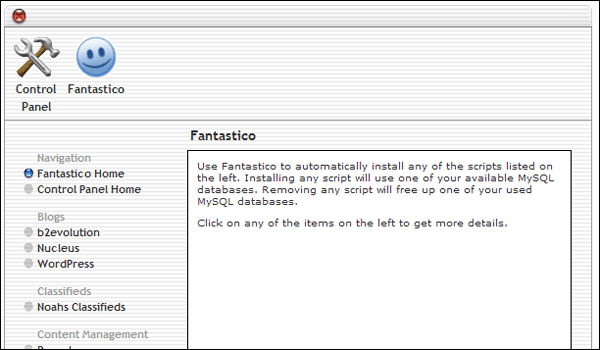
Get Started with Fantastico Deluxe
In the left sidebar you will find WordPress test links in the Blogs category. To begin the installation, click on the WordPress text link and the script window will open on the right side. On this page, you will get a text link New Installation. Simply click on that link.
Install WordPress Using Fantastico (1/3)
Hence, you need to overcome three steps to install WordPress and this is the first step. In this step, you have to fill up some fields. See the image and follow the instructions:
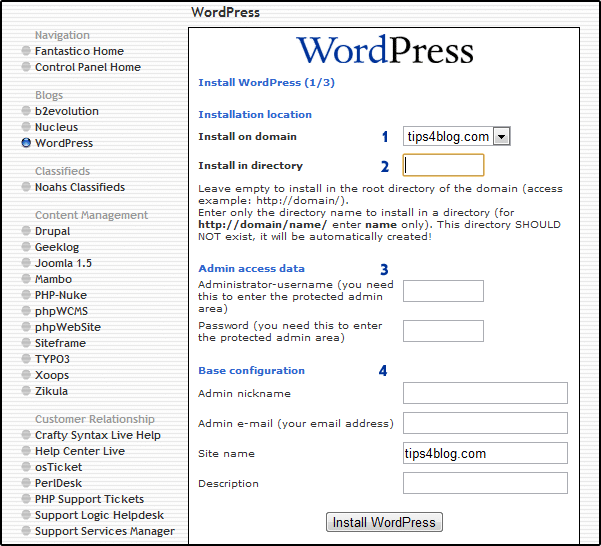
1. Install on Domain
WordPress will automatically choose which domain to install. You just need to make sure that the correct domain has selected for the installation of your blog.
2. Install in Directory
Leave this field blank if you want to install your WordPress blog in the main directory. That means, when you will finish the installation procedure, you will get your blog working simply typing the domain name in the address bar. However, if you want to install your WordPress blog in a sub-directory, (e.g. yourdomain.com/blog) enter the name of the directory (e.g. Blog) in this field. I recommend that you install in the main directory.
3. Admin Access Data
Enter your administrator username and password, which you will need to login in your WordPress administration page.
4. Base Configuration
There are four fields to fill in. First, you have to give admin nickname, which will be shown on your post. After that enter your valid email address, site name and finally a meaningful description that will describe about your blog. Click on the Install WordPress button.
Install WordPress Using Fantastico (2/3)
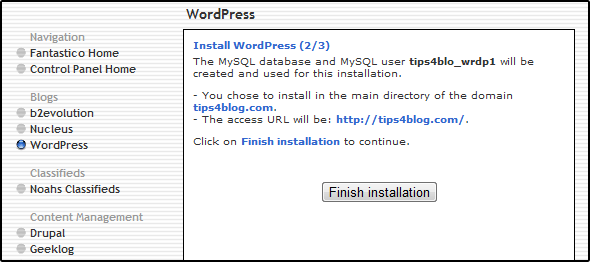
Second step is basically a review of what has been done. You will be shown, your MySQL database name and username, the directory you have chosen and the access URL. Finally, click on the Finish Installation button to go to the third and final step of the installation process.
Install WordPress (3/3)
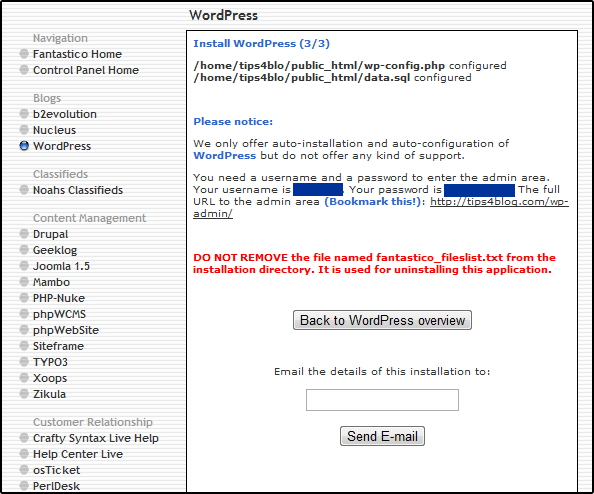
Congratulations! Your WordPress blog has been installed. On this page, you will find the information about your ‘wp–config.php‘ file and remember your username and password as well as where to login with that username and password.
If you want all the information in your email address, just enter your email ID and click on the Send Email button.
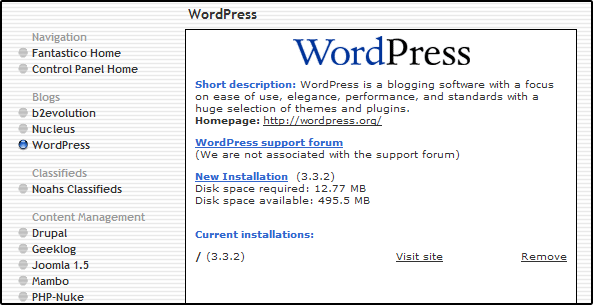
In the end, you get some information, such as a short description of WordPress, disk space required for the installation and disk space available after installation in the panel. You can view your blog by clicking on Visit site text link.
Now, in the browser address bar type yourdomain.com/wp-admin. Enter username and password and start your blog with WordPress.
If you find this tutorial helpful or want to share your opinion, feel free to comment us or subscribe to our feed if you need regular update of our tutorials.


Recent Comments