
Introduction
Thank you for your interest in this plugin. If you have any questions that are beyond the scope of this help documentation, please feel free to email us at realwebcare @ gmail dot com. We’d be happy to help you.
installation
Installing 'WRC Pricing Tables Ultimate' Plugin is as simple as installing any other WordPress Plugin. If you don't know how to install plugins, please review the two options below:
1. Install by ZIP File
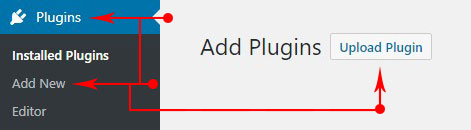
1 - Go to the WordPress admin panel and then navigate to Plugins > Add New > Upload.
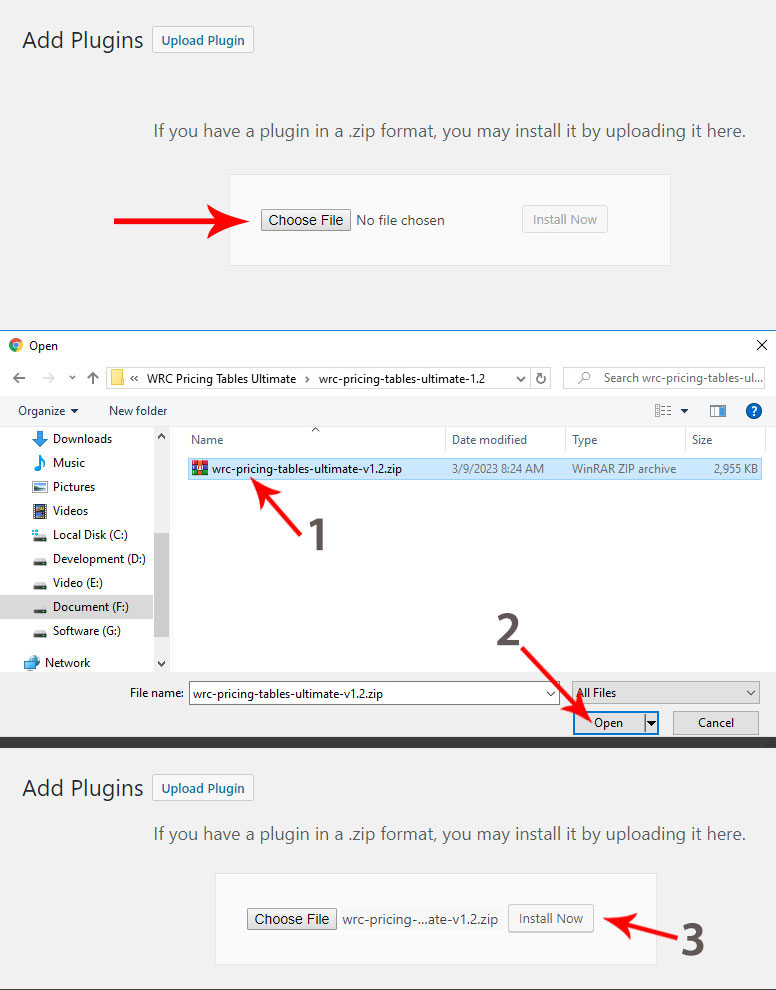
2 - Choose the plugin zip file named as wrc-pricing-tables-ultimate-v1.0.zip and click the Install Now button
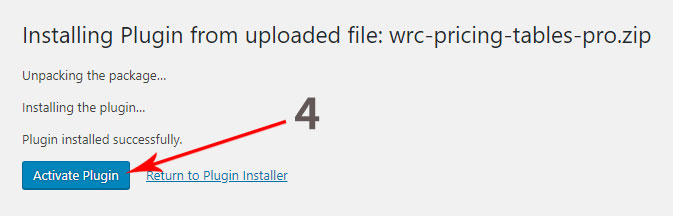
3 - Wait untill the installation process ends. When you will see the text, Plugin installed successfully click on Activate Plugin button.
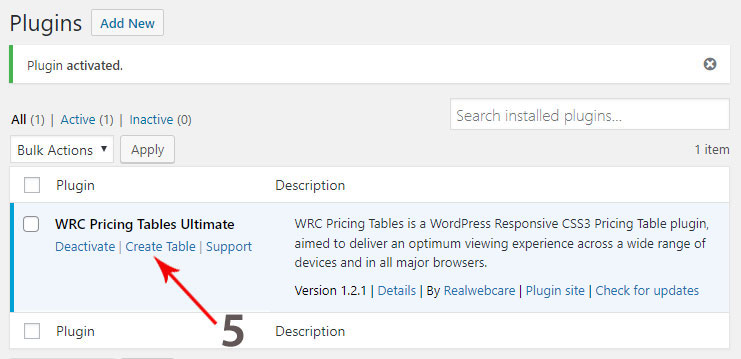
4- Congratulations! you are ready to create your pricing table. Click on Create Table link to create a pricing table from 13 ready-made templates.
2. Install by FTP
Quick Start
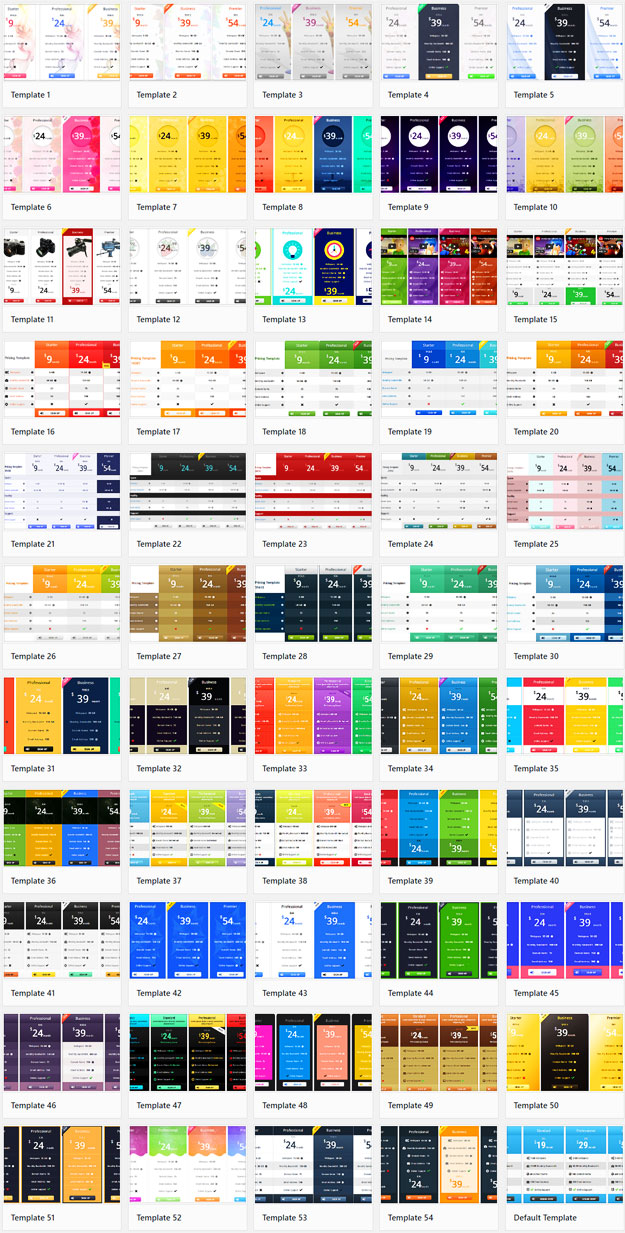
From WordPress admin panel, navigate to Pricing Tables > Templates. Select your table from 50+ ready-made templates and click on Create Table button on mouse over. You will get a ready-made pricing table instantly! Navigate to All Pricing Tables and start configuring table content.
Edit Pricing Table & Features
You can customize the features of your pricing table as per your preference. After updating the features, go to the Edit Columns section and input the values of the features in the corresponding feature section. For your convenience, the column features are divided into six parts as follows:
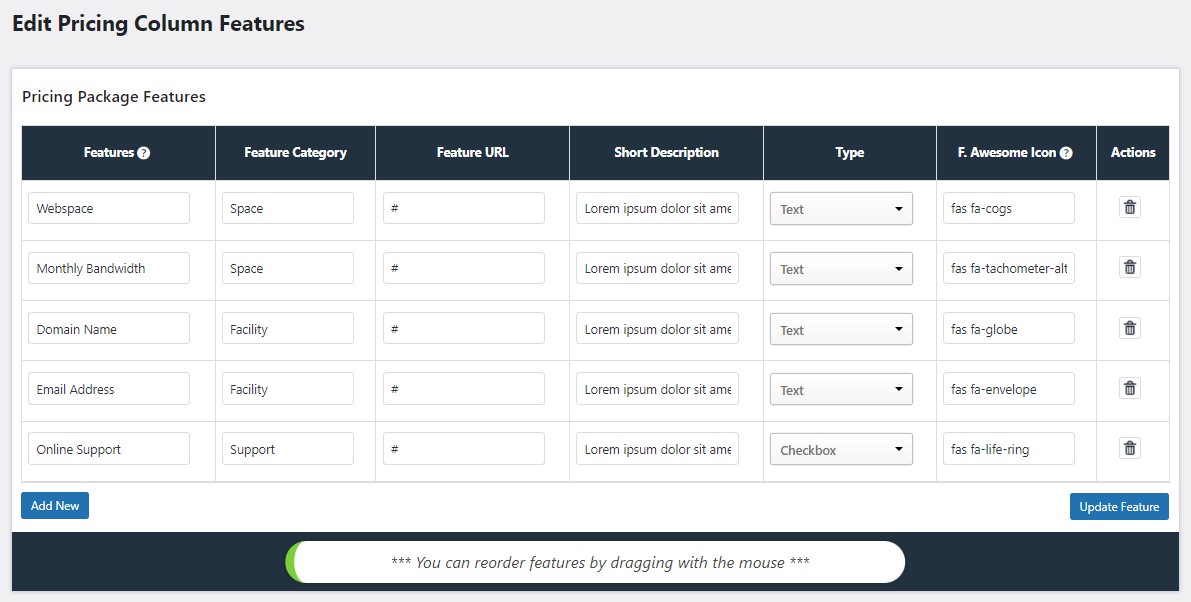
Finally, click on the Update Feature button to include the feature in the pricing table.
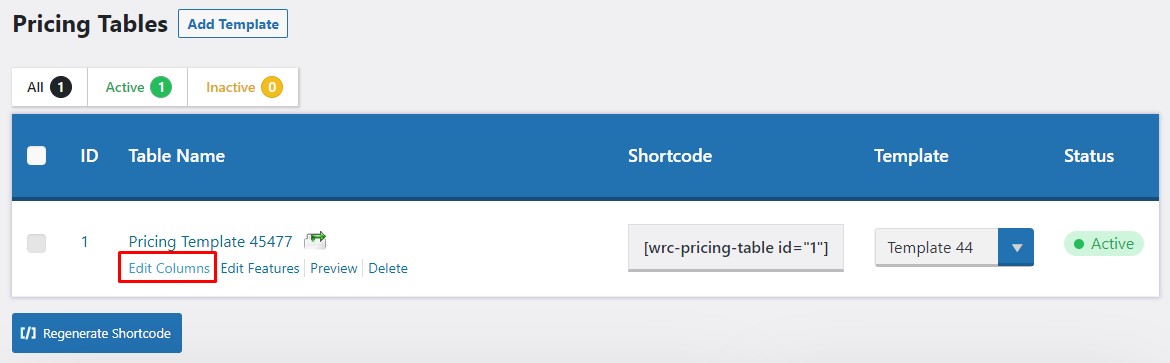
Edit Columns
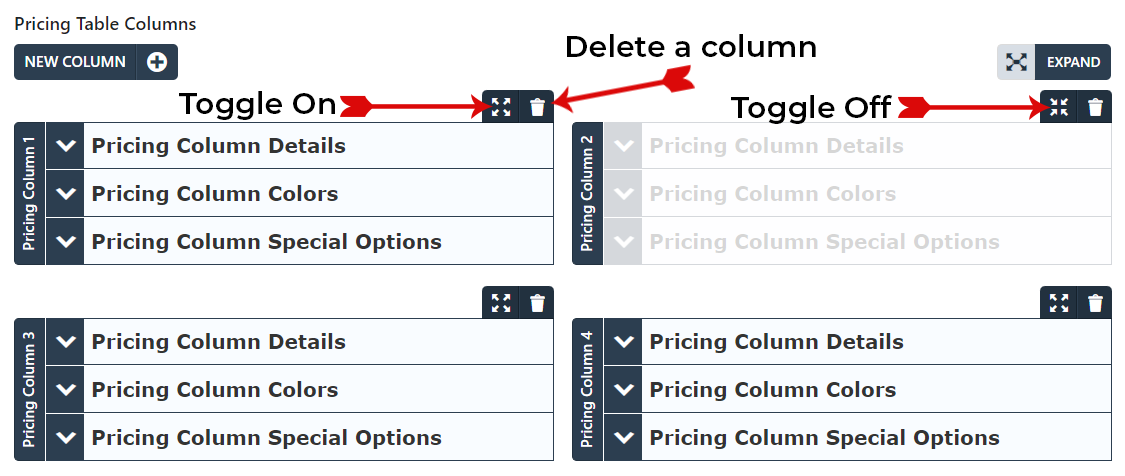
Mouse over your recently created pricing table and click on the Edit Columns link. You can add as many columns to the pricing table as you like. Each column has three sections:
Pricing Column Details
This section has six parts:
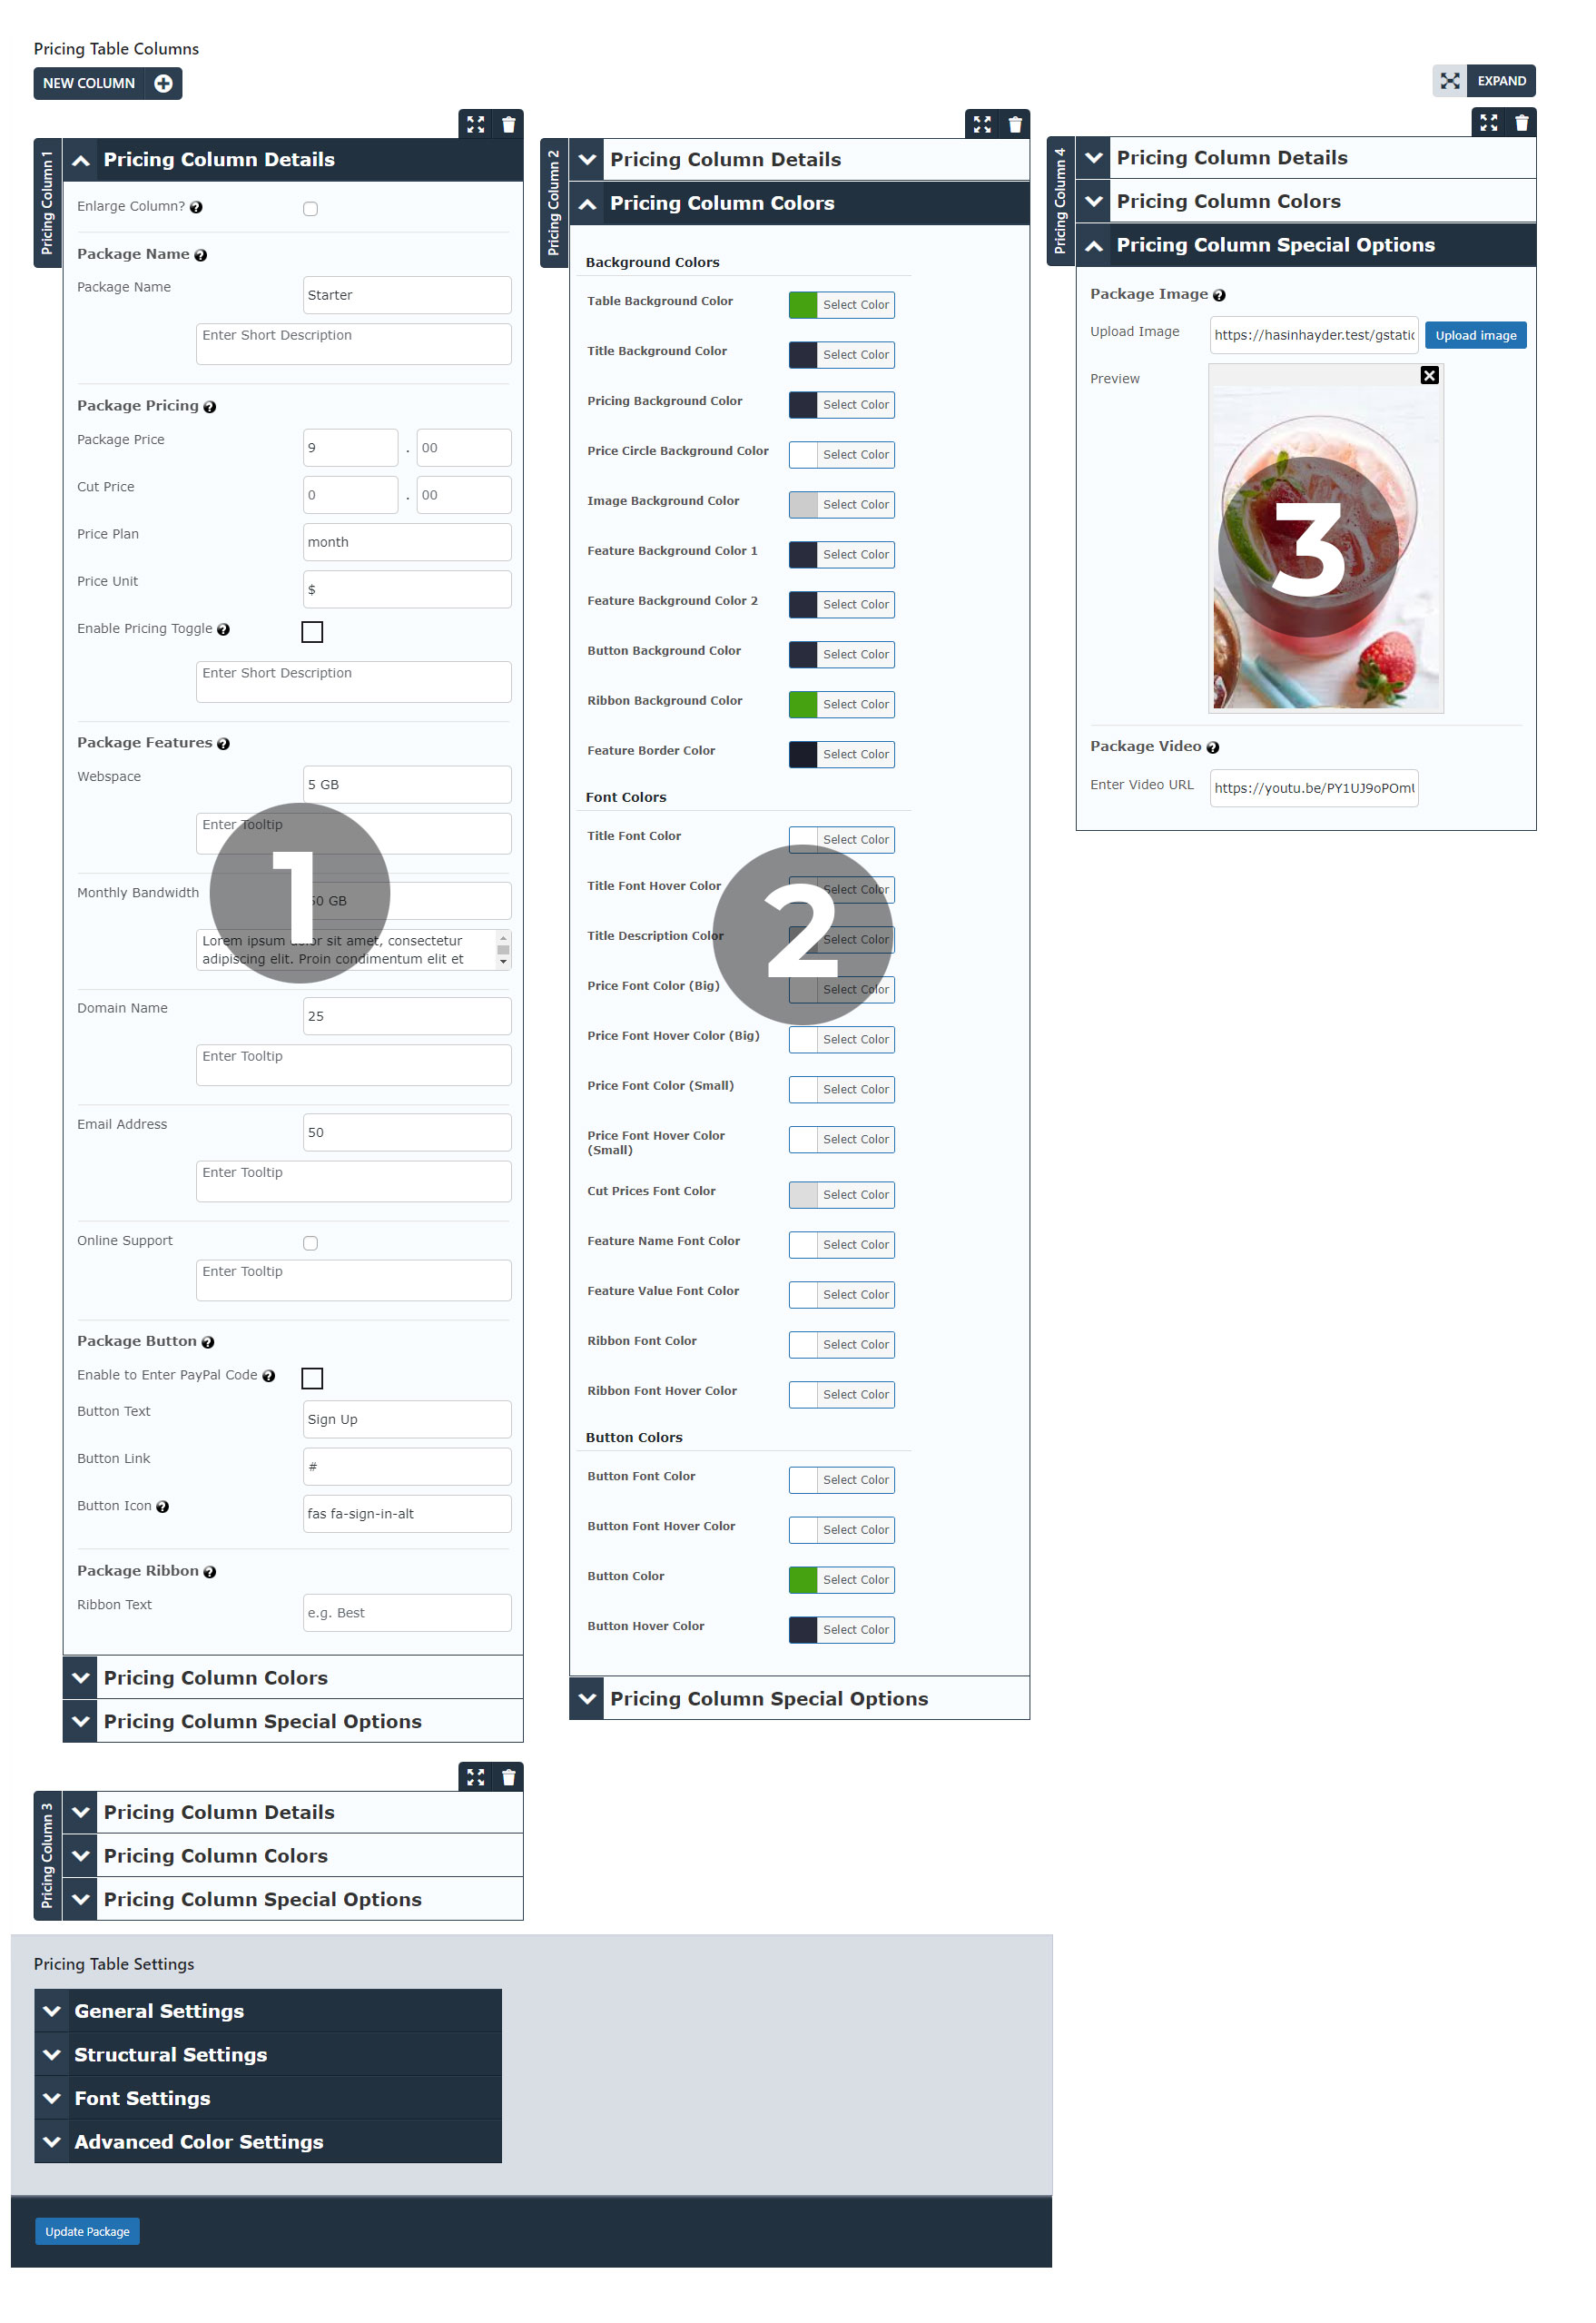
- Enlarge Column: Check this box to make the package stand out by making its column slightly larger than the others.
- Package Name: Enter the name of the package and optionally a short description in the text area.
- Package Price: Enter the package price. You can also enter a cut price for the package if you want to show a discount. Check the Enable Pricing Toggle option if you want to show another price for this package.
- Package Feature: Enter the package features here. The feature input field will be set up according to the feature type you declared in the Edit Features section. Each feature has a tooltip box where you can provide a summary of the feature that will appear as a tooltip in the pricing table.
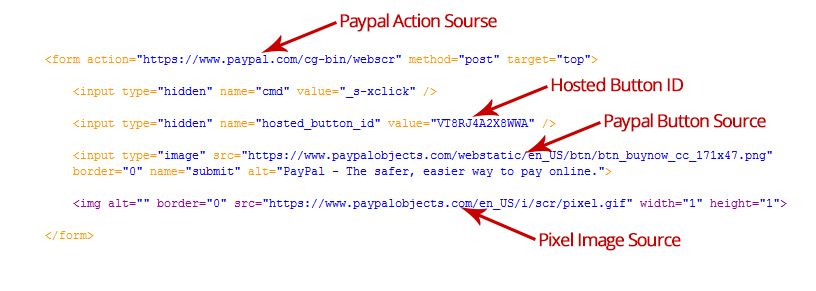
- Package Button: Enter the button text, URL, and Font Awesome icon class here. If you want to add a PayPal button, check the Enable PayPal Code option and fill in the necessary fields.
- Package Ribbon: Enter the ribbon text here to make the package more attractive and specific.
Pricing Column Colors
In this section, you can select colors for your pricing table using the ColorPicker tool. It is divided into three categories:
Pricing Column Special Options
This section will help you make your packages more attractive by using images or videos. You can easily add images for each package individually using the WordPress Media Uploader. You can also add videos (YouTube only) for each package by entering the YouTube video URL in the provided text field. To display the image or video, you must enable the Package Image or Video option in the General Settings under Pricing Table Settings. In the General Settings, you can also set the image width, height, margin, and opacity to ensure that the image is the correct size for the pricing table. Similarly, you can set various parameters for the video, such as its height.
Hide or Delete Columns
Each column has a trash icon on the top right to delete the column. There is also a toggle icon next to each trash icon to disable/hide a column instead of deleting it. You can reactivate the column again by clicking on the toggle icon.
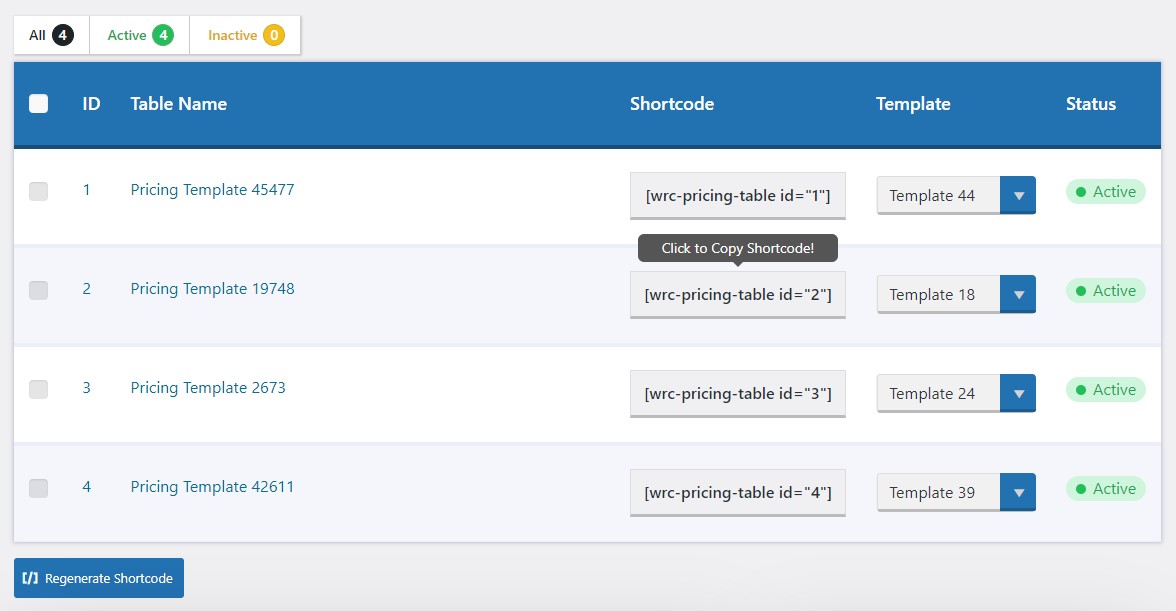
Shortcode
For every pricing table, a unique shortcode is automatically generated with a specific ID. To display a pricing table shortcode in a WordPress post or page, you need to access the post or page editor in the WordPress dashboard. Here's how:
After you have inserted the shortcode, you can save or publish the post or page. Once you visit the newly created post/page, you will be able to see the pricing table in action.
general settings
To enable the pricing table display, you must first activate it in the settings. Here, you can adjust the shortcode, column border, column shadow, column gradient, column features, and show/hide options. There are several options to configure:
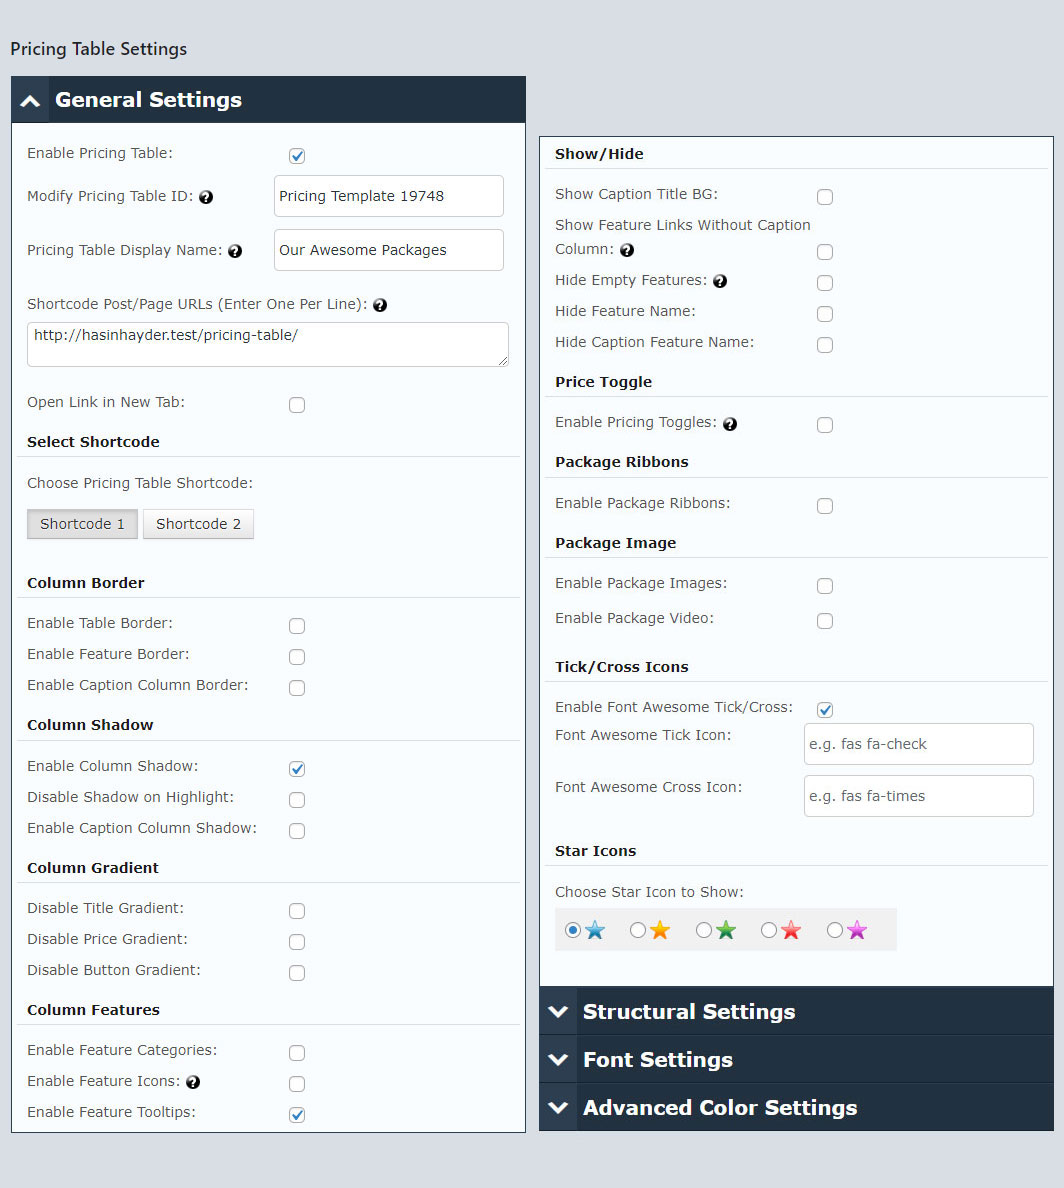
- Modify Pricing Table ID: When creating a table from a pre-made template, the system automatically generates a name for the table. This name serves as the basis for the rest of the options in the database. It is important to note that the auto-generated table name must be unique to prevent conflicts with existing tables in the database. In the event that a duplicate name is entered, the system will append an extra word to the name to ensure uniqueness.
While the system can handle duplicate names, it is best practice to use unique names when creating tables to avoid confusion and potential errors down the line. By taking the time to choose unique names, you can ensure that your database is organized and easy to manage. - Pricing Table Display Name: In the previous option, it was not possible for us to assign a name of our choice to maintain uniqueness in the pricing table. However, to add more convenience and flexibility, we have introduced a new feature where you can select a name of your preference for your pricing table. Even if the name coincides with another table, it will not pose any issues.
- Shortcode Post/Page URLs (Enter One Per Line): The General Settings section of each pricing table now includes the innovative Shortcode Post/Page URLs feature. This can help you ensure that your Custom CSS file only contains the customizations relevant to the chosen pricing table. Just include the URL of the page where the price table is located and you'll be set! This will result in significantly smaller and faster loading Custom CSS files.
- Shortcode: There are two shortcodes for the pricing table. For desktop view there are no differences, but in tablet and mobile view there are differences. In tablet, Shortcode1 will divide pricing table column into two columns per row, where in mobile, each column of the price table will be displayed below each other. Shortcode2 will just adjust the pricing table column by the screen size.
- Column Border: Enable table border, feature border and caption column border here.
- Column Shadow: Enable pricing column and caption column shadow here. You can disable column shadow on highlight by unchecking the checkbox.
- Column Gradient: Enable/Disable title, price and button section's background gradient here.
- Column Features: To display feature category, mark Enable Feature Categories checkbox. Other two options will enable or disable feature icons (font awesome) and tooltips.
- Show/Hide: If caption column is enabled, you can set background for caption column title by enbaling Show Caption Title BG.Hide Empty Features option will hide those features which are empty. Hide Feature Name and Hide Caption Feature Name will hide feature value and feature name.
- Price Toggle: To display pricing toggle, mark Enable Pricing Toggles checkbox. It will open 3 textbox fields, where you can enter toggle texts, e.g. monthly and yearly. Special Text field is for any kind offer if you have for the second toggle.
- Package Ribbons: Enable ribbon by marking the checkbox here. The table has 5 different types of ribbons to show.

- Package Image: To display image in price section of each column, mark the checkbox here. You will get 6 options here:
- Use Image as Background Image: Mark this checkbox if you want to show image as a background image for pricing columns. Otherwise, image will be shown in price section only.
- Choose how you like to display Images: Here you have to select how to display image. You can display images with/without price and title.
- Image Width: Enter width of the image here.
- Image Height: Enter height of the image here.
- Image Margin: Enter image margin here. It will help you to place the image in the column properly. If you want to set image at the middle center, just enter auto.
- Image Opacity: To display price on image more clearly, you can set an opacity of the image.
- Package Video: To display video (YouTube Only) in price section of each column, mark the checkbox here. You will get 4 options here:
- Choose how you like to display Video: Here you have to select how to display video. You can display videos with/without price and title same as images.
- Video Height: Enter height of the video here.
- Allow Full Screen?: Mark this checkbox to allow full screen on YouTube video.
- Show YouTube logo?: Mark this checkbox to show YouTube logo on player.
- Tick/Cross Icons: Select your preferred tick and cross icon from 20 different icons. You can also use font awesome tick and cross icon by enabling Enable Font Awesome Tick/Cross. You just need to enter font awesome icon class for tick and cross icon.
- Star Icons: If you want to show star icon rather than tick/cross icon, you can mark the checkbox here. To show this icon on pricing column, you have to set feature type as Star or Checkbox from Edit Features section.
structural settings
Structural Settings is divided into 6 categories are as follow:

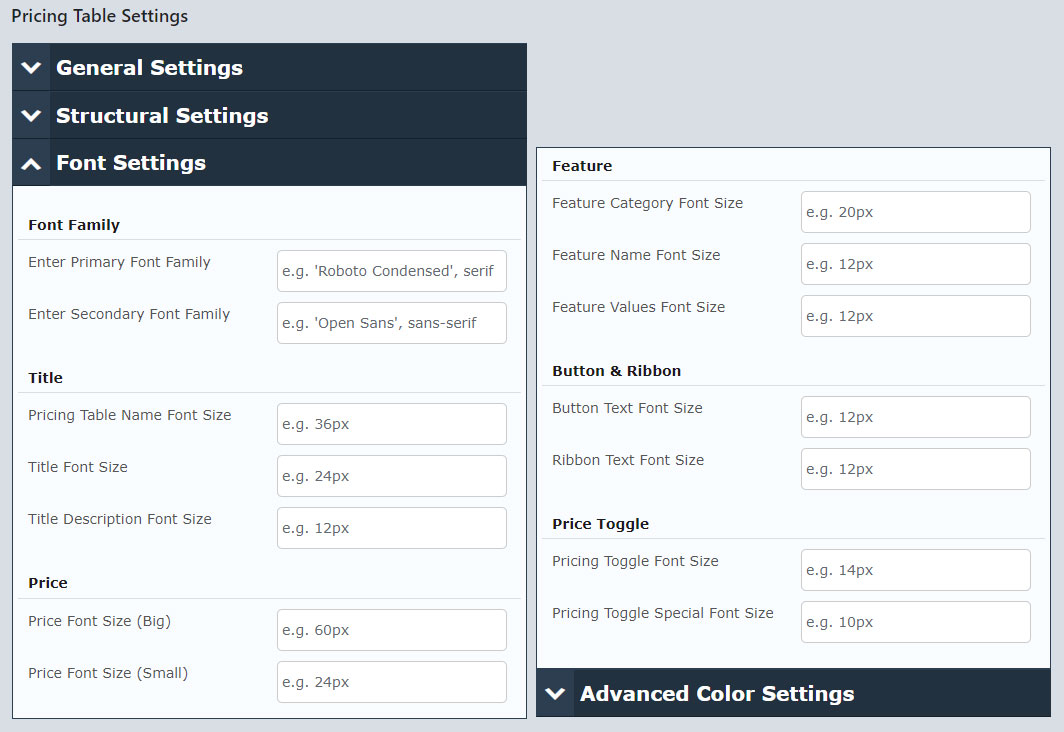
font settings
Here, you can set font family and font size for the pricing table. There are 6 categories here:
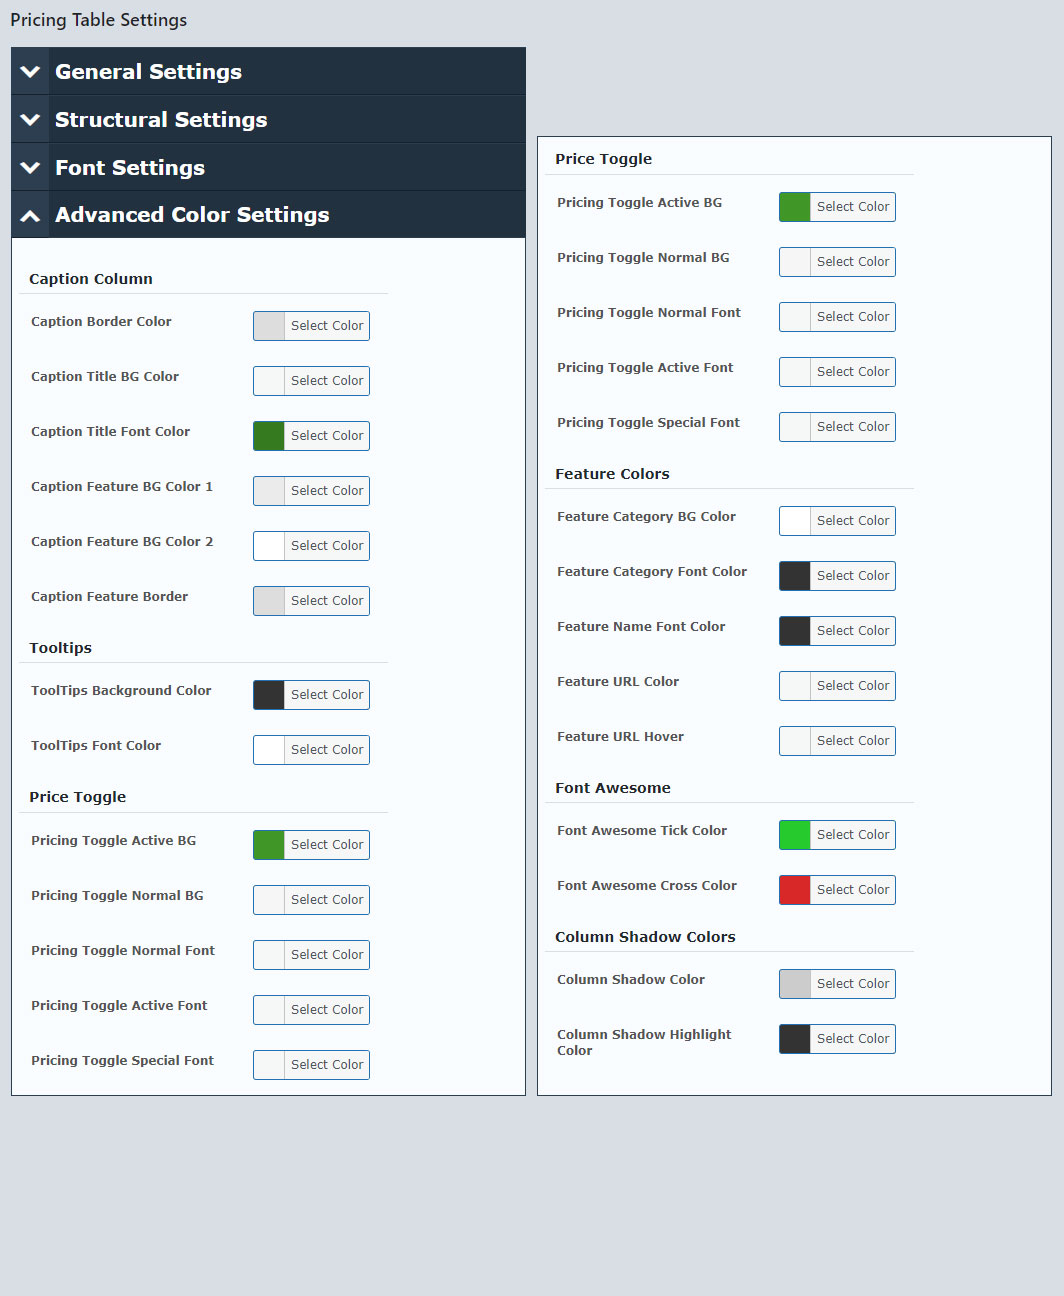
advanced color settings
Advanced Color Settings is for some of the other items of the pricing table. This section is divided into 6 categories are as follows: For example, if the caption column is enabled, then the column color can be selected. You can also change the background color of tooltip as well as it's font color. Column Shadow Color and Shadow Highlighted Color can also be selected here.
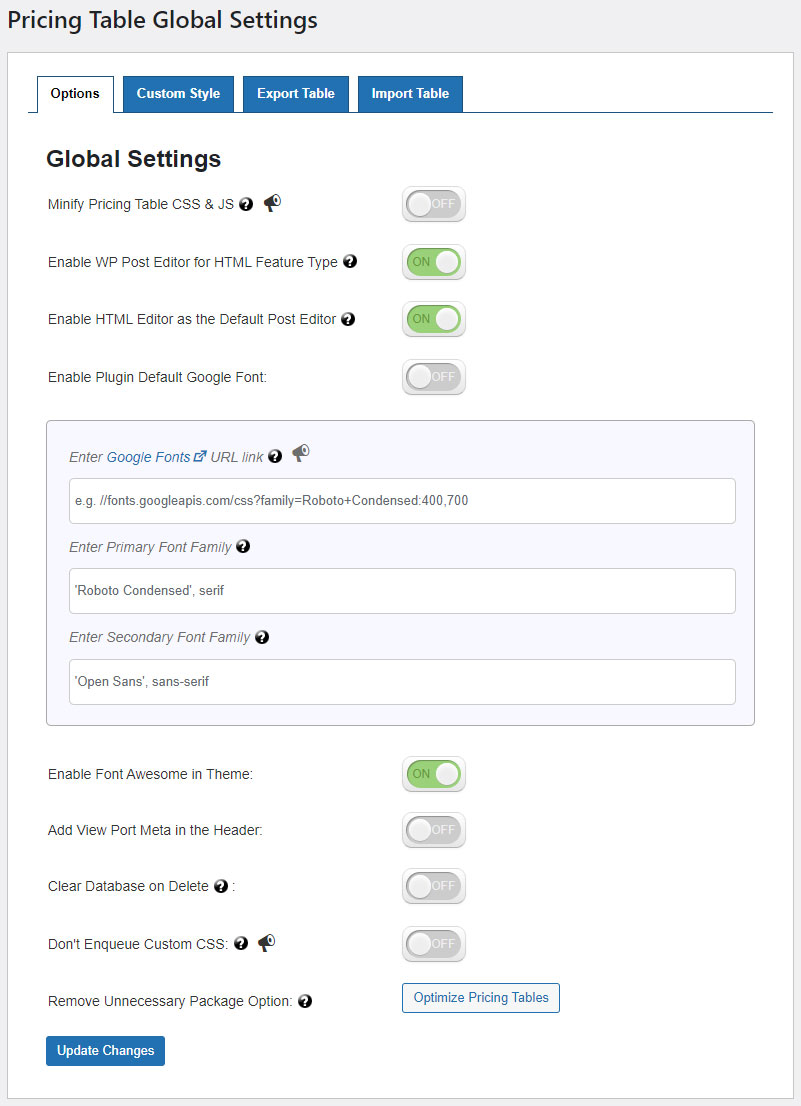
global settings
GLobal Settings are mainly to control CSS & JS files. There are 6 options here:
Options
export table
Export Table:
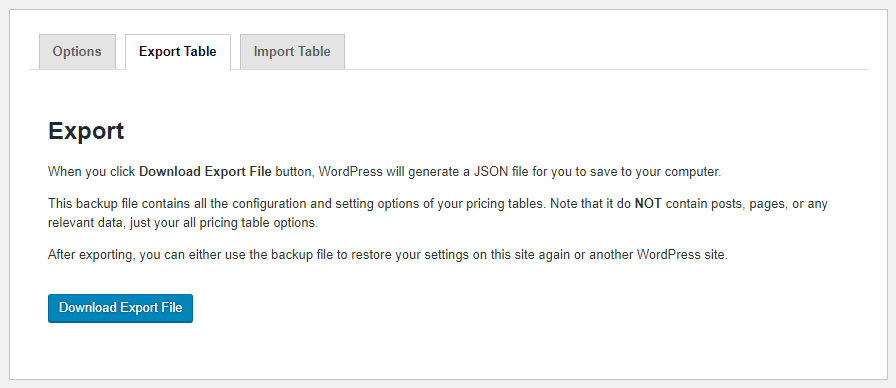
Click on Download Export File button to generate a JSON file for you to save in your computer. This backup file contains all the configuration and setting options of your pricing tables. Note that it do NOT contain posts, pages, or any relevant data, just your all pricing table options. After exporting, you can either use the backup file to restore your settings on this site again or another WordPress site.
import table
Import Table:
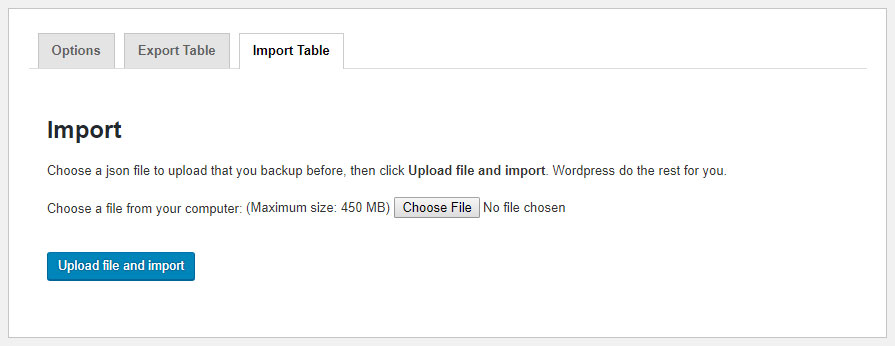
Select a json file to upload that you exported before from Export Table tab, and click on Upload file and import. Wordpress do the rest for you.
Video Demo
Sources & Credits
I've used the following fonts, icons or other files as listed.